User manual DA-LITE UPM-1

Lastmanuals offers a socially driven service of sharing, storing and searching manuals related to use of hardware and software : user guide, owner's manual, quick start guide, technical datasheets... DON'T FORGET : ALWAYS READ THE USER GUIDE BEFORE BUYING !!!

If this document matches the user guide, instructions manual or user manual, feature sets, schematics you are looking for, download it now. Lastmanuals provides you a fast and easy access to the user manual DA-LITE UPM-1. We hope that this DA-LITE UPM-1 user guide will be useful to you.

Lastmanuals help download the user guide DA-LITE UPM-1.


Mode d'emploi DA-LITE UPM-1
Download

You may also download the following manuals related to this product:

   DA-LITE UPM-1 SPECIFICATION DATA (200 ko)
   DA-LITE UPM-1 SCHEMA AND PARTS LIST (112 ko)

Manual abstract: user guide DA-LITE UPM-1

Detailed instructions for use are in the User's Guide.

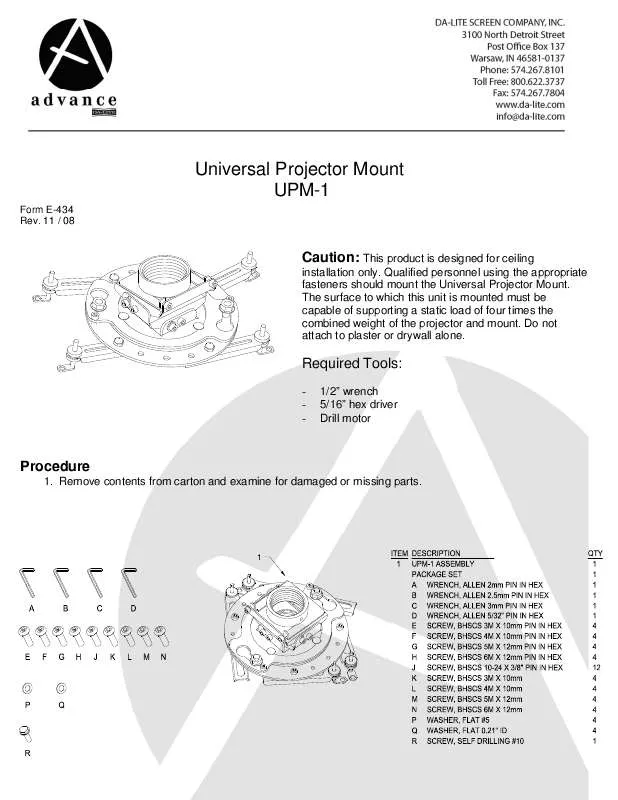
[. . . ] Universal Projector Mount UPM-1 Form E-434 Rev. 11 / 08 Caution: This product is designed for ceiling installation only. [. . . ] As an option, replace the non-secure screws with the 10-24 security screws at this time. Only replace one screw per side on the U-Joint. See Figure 2. REPLACE TWO SCREWS Figure 2 REPLACE FOUR SCREWS REPLACE ONE SCREW PER SIDE IF USING SECURE SCREWS 4. Loosen the Screws on the bottom portion of the mount to adjust the Leg Assemblies to match the projector mounting holes. Loosen the Thumb Nuts to adjust the feet. Fasten the Feet to the projector with the hardware or security hardware provided. Tighten the fasteners holding the Legs and Feet. LOOSEN SCREWS TO ADJUST LEGS LOOSEN THUMB NUTS TO ADJUST FEET Figure 3 PROJECTOR MOUNTING HOLES 5. Install the support pipe (not included) and attach the Coupling securely. Screw a #10 self-drilling screw into the threaded pipe, through the existing hole in the Coupling to prevent removal of the Coupling. Route power cords and signal cables through the pipe at this time. 1-1/2 PIPE (NOT SUPPLIED) Figure 4 COUPLING INSTALL COUPLING WITH GROOVE LOW R 7. Secure the projector mount to the Coupling by sliding the U-Joint Top into the groove of the Coupling and securing it with the Coupling Clamp and screws from step 2. This joint should be utilized as a disconnect for servicing the projector. Figure 5 FLANGED NUT AND SCREW 8. [. . . ] Use the screws shown for pitch and roll adjustment. See Figure 7. FOUR SCREWS FOR ROLL ADJUSTMENT FOUR SCREWS FOR PITCH ADJUSTMENT Figure 7 [. . . ]

DISCLAIMER TO DOWNLOAD THE USER GUIDE DA-LITE UPM-1

Lastmanuals offers a socially driven service of sharing, storing and searching manuals related to use of hardware and software : user guide, owner's manual, quick start guide, technical datasheets...
In any way can't Lastmanuals be held responsible if the document you are looking for is not available, incomplete, in a different language than yours, or if the model or language do not match the description. Lastmanuals, for instance, does not offer a translation service.

Click on "Download the user manual" at the end of this Contract if you accept its terms, the downloading of the manual DA-LITE UPM-1 will begin.

Search for a user manual


Copyright © 2015 - LastManuals - All Rights Reserved.
Designated trademarks and brands are the property of their respective owners.

flag