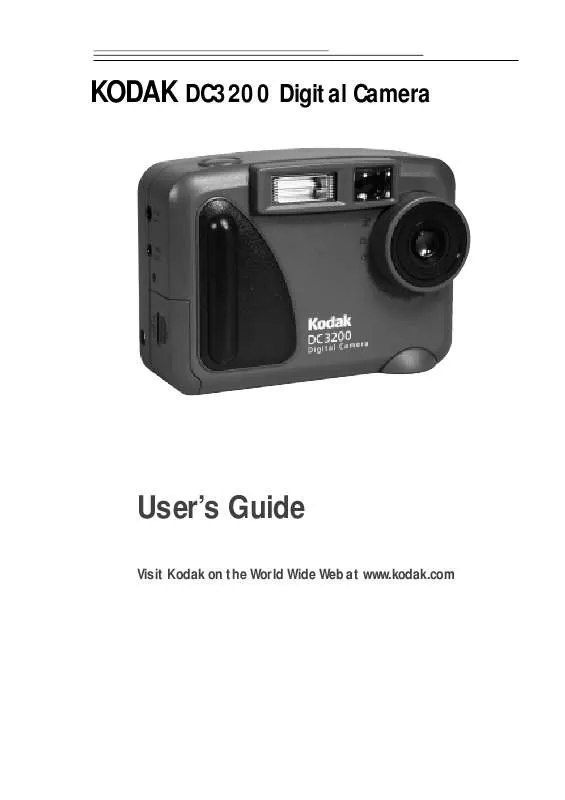
User manual KODAK DC3200
Lastmanuals offers a socially driven service of sharing, storing and searching manuals related to use of hardware and software : user guide, owner's manual, quick start guide, technical datasheets... DON'T FORGET : ALWAYS READ THE USER GUIDE BEFORE BUYING !!!
If this document matches the user guide, instructions manual or user manual, feature sets, schematics you are looking for, download it now. Lastmanuals provides you a fast and easy access to the user manual KODAK DC3200. We hope that this KODAK DC3200 user guide will be useful to you.
Lastmanuals help download the user guide KODAK DC3200.
Manual abstract: user guide KODAK DC3200
Detailed instructions for use are in the User's Guide.
[. . . ] KODAK DC3200 Digital Camera
User's Guide
Visit Kodak on the World Wide Web at www. kodak. com
©Eastman Kodak Company, 2000 Kodak and Photolife are trademarks of Eastman Kodak Company.
Table of Contents
1 Getting Started . 7
Previewing a Picture Before it is Taken . 12 Setting a Quickview for Each Picture . . 16 Copying Pictures from the Camera to a Picture Card . [. . . ] CF card readers provide a fast and easy alternative to serial cable connections. For details about available accessories, ask a dealer of KODAK products, or visit our Web site at http://www. kodak. com/go/ accessories. Once the camera is connected to a computer and the software is installed, you are ready to copy pictures from the camera to your computer.
5
29
Connecting the Camera to Your Computer
An RS-232 serial cable is provided, so you can connect your camera to a Windows-based computer. When connecting the camera, use a KODAKspecified AC adapter. For details about available accessories, ask a dealer of KODAK products, or visit our Web site at http://www. kodak. com/go/ accessories.
1 With the computer turned off, plug the
appropriate end of the serial cable into an available 9-pin serial port on the computer. Serial ports are usually labeled COM1 and COM2, or A and B. If your computer has a 25-pin port, you need to attach a 9-pin adapter (available at your local computer store) to the port before attaching the serial cable to the computer. If the ports are not labeled, see your computer User's Guide for a diagram that illustrates the external ports.
2 Plug the other end of the serial cable into the
serial port on the side of your camera.
3 Turn the computer on. 4 Set the camera Power/Mode switch to the
position.
5 Press the MENU button to display the Menu
screen on the LCD.
30
6 Press a
DE L E T E P C C ONN E C T P R I N T ORDE R P RO T E C T
/ button until PC CONNECT is highlighted, and then press the SELECT button.
The PC Connect screen appears.
7 Press a
P C C ONNE C T EX I T ON
/ button until ON is highlighted, and then press the SELECT button.
The camera is ready to communicate with the computer. If you get a message on your computer stating that the camera is not connected, refer to the "Troubleshooting" chapter.
To cancel the PC Connection mode, press the MENU button.
5
31
Using the DC3200 Picture Transfer Software
With the camera connected to your computer, you are ready to open and use the software that you installed. (See "4 Installing Your Software" on page 27. ) NOTE: The DC3200 Picture Transfer Software will display pictures from the camera internal memory unless a Picture Card is present in the camera. To display pictures from the internal memory, eject the Picture Card before starting the software. To display pictures from a Picture Card, insert the Picture Card before starting the software.
1 To start the DC3200 Picture Transfer Software, click the Start button on the
desktop. From the Programs menu, choose Kodak, then DC3200, then KODAK DC3200. The DC3200 Picture Transfer Software communicates with the camera and retrieves pictures from the camera. Pictures are displayed as thumbnails.
Select All button
Save button Settings button Close button
Thumbnail image
32
2 Click the picture you want to copy to your computer.
The border of the selected thumbnail picture turns light blue. To select all pictures, click the Select All button. To select multiple pictures, hold down the Ctrl key and click the desired pictures. To select all pictures that reside between two pictures, hold down the Shift key and click the first and last desired pictures.
3 Click the Save button.
The Select Folder dialog box appears.
4 Specify the destination folder and click the OK button.
The pictures are copied to your computer. Unless you specify a different folder name and location, a folder is created based on the current date using the format [YYYY-MM-DD] in this location: c:\My Documents\My Pictures. Pictures are copied into this new folder. Example: If the date is August 1, 2000, the pictures are copied into the folder named "2000-08-01". [. . . ] In Kodak lab tests, NiMH rechargeable batteries delivered the outstanding results in a variety of conditions. Ni-MH batteries are designed for high-demand devices, such as digital cameras, and do not exhibit the "memory" effects seen with other rechargeable technologies. If you elect to use alkaline batteries in your camera, you will obtain better performance from "photo-flash grade" alkaline batteries, such as KODAK PHOTOLIFE alkaline batteries. These types of batteries last 50
more than twice as long in digital cameras as ordinary alkaline batteries. [. . . ]
DISCLAIMER TO DOWNLOAD THE USER GUIDE KODAK DC3200 Lastmanuals offers a socially driven service of sharing, storing and searching manuals related to use of hardware and software : user guide, owner's manual, quick start guide, technical datasheets...manual KODAK DC3200


