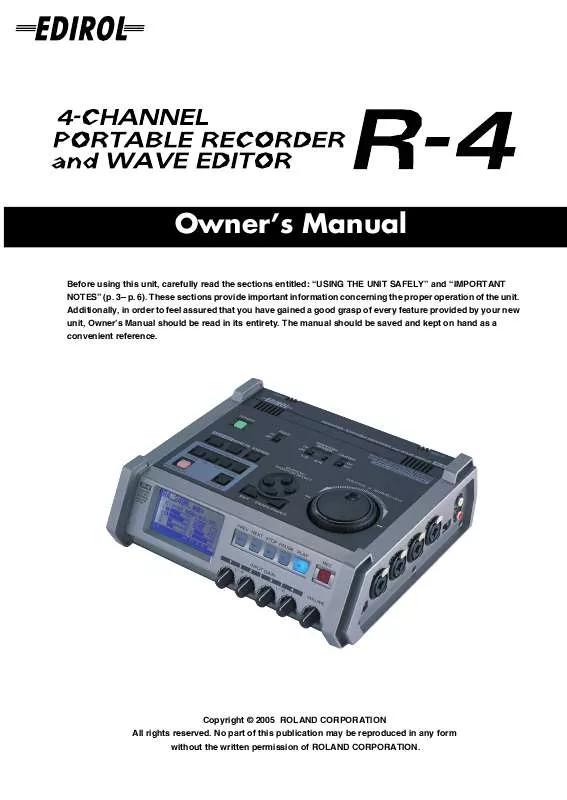
User manual ROLAND R-4
Lastmanuals offers a socially driven service of sharing, storing and searching manuals related to use of hardware and software : user guide, owner's manual, quick start guide, technical datasheets... DON'T FORGET : ALWAYS READ THE USER GUIDE BEFORE BUYING !!!
If this document matches the user guide, instructions manual or user manual, feature sets, schematics you are looking for, download it now. Lastmanuals provides you a fast and easy access to the user manual ROLAND R-4. We hope that this ROLAND R-4 user guide will be useful to you.
Lastmanuals help download the user guide ROLAND R-4.
Manual abstract: user guide ROLAND R-4
Detailed instructions for use are in the User's Guide.
[. . . ] Owner's Manual
201a
Before using this unit, carefully read the sections entitled: "USING THE UNIT SAFELY" and "IMPORTANT NOTES" (p. These sections provide important information concerning the proper operation of the unit. Additionally, in order to feel assured that you have gained a good grasp of every feature provided by your new unit, Owner's Manual should be read in its entirety. The manual should be saved and kept on hand as a convenient reference.
Copyright © 2005 ROLAND CORPORATION All rights reserved. [. . . ] The system menu screen appears in the display.
fig. pj-name2. eps
2
Use the [CURSOR] buttons to choose 7 Project Name, and press the [ENTER] button. The Project Name screen appears.
fig. pj-name3. eps
3
Use the [CURSOR] buttons to choose the Name you want to edit, and press the [ENTER] button. A screen for editing the project name appears.
4
Use the [CURSOR] buttons, [SCRUB/VALUE] dial, [CLEAR] button, and [MARK] button to edit the name. When you're finished, press the [ENTER] button. You're returned to the Project Name screen. * If you decide to cancel, press the [EXIT] button.
Available characters (space) !#$%&'()+, -. 01234546789;=@ ABCDEFGHIJKLMNOPQRSTUVWXYZ[]^_` abcdefghijklmnopqrstuvwxyz{}
5
Press the [EXIT] button once again to return to the main screen. If you want to make other system-related settings, use the [CURSOR] buttons to select the desired menu item.
67
System settings
Executing HDD Utility or CF Utility commands
As an example, we'll show how to execute HD Utility commands. You can also use the same procedure to execute CF Utility commands.
fig. hd-uti1. eps
1
Press the R-4's [SYSTEM] button. The system menu screen appears in the display.
fig. hd-uti2. eps
2
Use the [CURSOR] buttons to choose 8 HDD Utility, and press the [ENTER] button. If you want to execute a CF Utility command, choose 9 CF Utility. * If you decide to cancel, press the [EXIT] button.
format fig. NO-CF. eps
* If no CompactFlash card is inserted, the message shown at right will appear.
3
Use the [CURSOR] buttons to choose either "Format" or "Check, " and press the [ENTER] button.
fig. hd-uti3. eps
4
The display will ask "Are you sure?" Use the [CURSOR] buttons to select "Yes" if you are sure you want to execute (or "No" if you decide to cancel without executing). Then press the [ENTER] button.
fig. hd-uti4. eps
The message shown at right will appear while processing is being performed. Don't turn off the power while processing is being performed. When processing has been completed, you will automatically return to the System Menu screen.
5
Press the [EXIT] button once again to return to the main screen. If you want to make other system-related settings, use the [CURSOR] buttons to select the desired menu item.
68
System settings
Executing Factory Reset (Restoring the factory settings)
fig. Fact-uti1. eps
1
Press the R-4's [SYSTEM] button. The system menu screen appears in the display.
fig. fact-reset. eps
2
Use the [CURSOR] buttons to choose 10 Factory Reset, and press the [ENTER] button. The Factory Reset screen appears.
3
Press the [ENTER] button if you want to execute Factory Reset. * If you decide to cancel, press the [EXIT] button.
fig. fact-reset2. eps
4
The display will ask "Are you sure?" Use the [CURSOR] buttons to select "Yes" if you are sure you want to execute (or "No" if you decide to cancel without executing). When processing has been completed, you will automatically return to the System Menu screen.
5
Press the [EXIT] button once again to return to the main screen. If you want to make other system-related settings, use the [CURSOR] buttons to select the desired menu item.
69
Appendix
Handling memory cards
You can use CompactFlash memory cards to transfer project files from the R-4's internal hard disk to your computer, or WAV files from your computer to the R-4's hard disk. * You can also transfer files directly via a USB connection. For details, refer to "Connecting the R-4 to your computer" (p. [. . . ] Windows® is known officially as: "Microsoft® Windows® operating system. " Apple and Macintosh are registered trademarks of Apple Computer, Inc. Mac OS is a trademark of Apple Computer, Inc. All product names mentioned in this document are trademarks or registered trademarks of their respective owners. CompactFlash and are trademarks of SanDisk Corporation and licensed by CompactFlash association. [. . . ]
DISCLAIMER TO DOWNLOAD THE USER GUIDE ROLAND R-4 Lastmanuals offers a socially driven service of sharing, storing and searching manuals related to use of hardware and software : user guide, owner's manual, quick start guide, technical datasheets...manual ROLAND R-4


