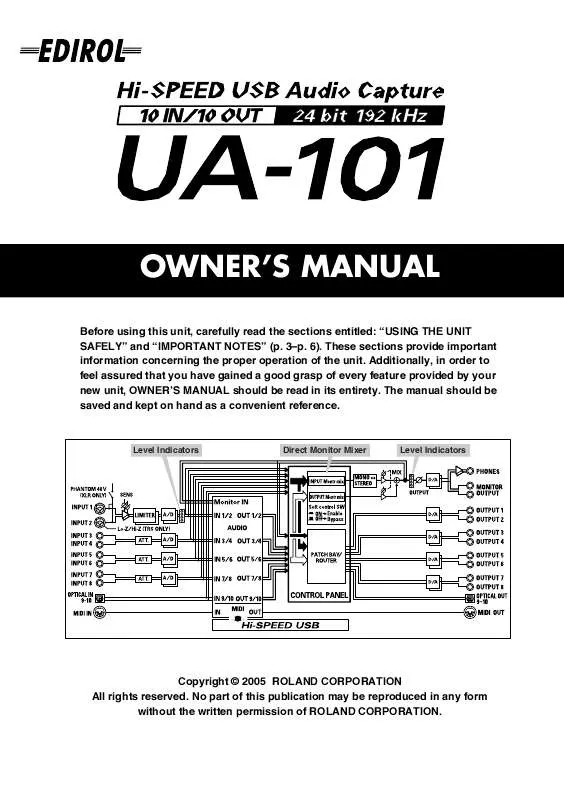
User manual ROLAND UA-101 MANUAL 2
Lastmanuals offers a socially driven service of sharing, storing and searching manuals related to use of hardware and software : user guide, owner's manual, quick start guide, technical datasheets... DON'T FORGET : ALWAYS READ THE USER GUIDE BEFORE BUYING !!!
If this document matches the user guide, instructions manual or user manual, feature sets, schematics you are looking for, download it now. Lastmanuals provides you a fast and easy access to the user manual ROLAND UA-101. We hope that this ROLAND UA-101 user guide will be useful to you.
Lastmanuals help download the user guide ROLAND UA-101.
Manual abstract: user guide ROLAND UA-101MANUAL 2
Detailed instructions for use are in the User's Guide.
[. . . ] OWNER'S MANUAL
201a
Before using this unit, carefully read the sections entitled: "USING THE UNIT SAFELY" and "IMPORTANT NOTES" (p. These sections provide important information concerning the proper operation of the unit. Additionally, in order to feel assured that you have gained a good grasp of every feature provided by your new unit, OWNER'S MANUAL should be read in its entirety. The manual should be saved and kept on hand as a convenient reference.
Level Indicators
Direct Monitor Mixer
Level Indicators
202
Copyright © 2005 ROLAND CORPORATION All rights reserved. [. . . ] After you've changed the sample rate setting of the UA-101, you must cycle the power to the UA-101 in order for the setting to take effect.
STEREO/MONO select switch (Direct Monitor section)
Use this to select to monitor the input signal in stereo or in monaural.
Direct Monitor Soft Control switch
Turn this on if you want to control input monitoring from ASIO 2. 0 compliant software or from UA-101 Control Panel (p. 38).
Direct monitor volume
This adjusts the balance between the monitor volume and the volume of the audio playback from the computer. Using the Direct Monitor volume control to adjust the volume will not affect the recording level.
Phantom power switch
If you're using condenser mics, turn on the phantom power switch. * If you've connected a device that does not require phantom power, you must turn the phantom power switch off to avoid damaging your device.
29
Basic connections and settings
Recording a digital signal
fig. digital
ON
Set the sample rate
Set this to the sample rate of your digital playback device
CD/MD/DAT player, hard disk recorder, etc.
Connections
Connect your digital audio device to the digital input connector.
Sample rate select switch
Set this to match the sample rate you've selected on your digital audio playback device and in your recording software. After you've changed the sample rate setting of the UA-101, you must cycle the power to the UA-101 in order for the setting to take effect. You can't record digital signal if you've selected 192 kHz.
Digital input switch
Turn this on so that the UA-101 will synchronize to the digital signal being input to the digital input connector. If the UA-101 is synchronized to the incoming signal, the SYNC indicator will light green. If the indicator is blinking green, synchronization has not been achieved. Please make sure that the sample rate of the connected digital device matches the setting of the UA-101's sample rate select switch.
Direct monitor volume
This adjusts the monitor volume. Using the Direct Monitor volume control to adjust the volume will not affect the recording level.
30
Basic connections and settings
Connecting various equipment
fig. various
Guitar/bass
Computer
Mixer, DJ mixer, etc.
Amplified speakers
USB cable
Mic
Effects processor, mixer, etc.
Synthesizer, etc.
Connections
Connect output jacks 18 to your external mixer, etc. Connect the outputs of your external mixer, synthesizer, etc. to input jacks 38.
Direct monitor volume
This adjusts the monitor volume. Using the Direct Monitor volume control to adjust the volume will not affect the recording level.
31
Basic connections and settings
5. 1 channel monitoring
5. 1 ch speaker system
Connections
Connect phone-type audio cables to the output jacks.
Patching within the UA-101
Use UA-101 Control Panel to patch the connections as follows. For details on UA-101 Control Panel, refer to "UA-101 Control Panel" (p. In the PATCH BAY area of UA-101 Control Panel, set OUTPUT 1-2 to WAVE OUT 1-2, OUTPUT 3-4 to WAVE OUT 3-4, and OUTPUT 5-6 to WAVE OUT 5-6.
Settings in Windows
1. From Windows Control Panel, open Sounds and Audio Devices
Properties dialog box. ("Input/output device settings" (p. Click the Audio tab.
In the Sound playback area, click the Default device field and choose EDIROL UA-101 from the list that appears.
3. In the Sound playback area, click [Advanced]. Click the Speakers tab.
In the Speaker setup field, choose 5. 1 surround sound speakers.
5. Click [OK] to close the Advanced Audio Properties dialog box. Click [OK] to close the Sounds and Audio Devices Properties dialog
box. [. . . ] Malatan House No. 1 Al Noor Street, Ruwi SULTANATE OF OMAN TEL: 2478 3443
THAILAND
Theera Music Co. 100-108 Soi Verng Nakornkasem, New Road, Sumpantawongse, Bangkok 10100 TEL: (02) 224-8821
CZECH REP.
CZECH REPUBLIC DISTRIBUTOR s. r. o Voctárova 247/16 CZ - 180 00 PRAHA 8, CZECH REP. TEL: (2) 830 20270
SPAIN
Roland Iberia, S. L. Paseo García Faria, 33-35 08005 Barcelona SPAIN TEL: 93 493 91 00
MARTINIQUE
Musique & Son Z. I. Les Mangle 97232 Le Lamantin Martinique F. W. I. [. . . ]
DISCLAIMER TO DOWNLOAD THE USER GUIDE ROLAND UA-101 Lastmanuals offers a socially driven service of sharing, storing and searching manuals related to use of hardware and software : user guide, owner's manual, quick start guide, technical datasheets...manual ROLAND UA-101


