User manual SONY SELP18110G
Lastmanuals offers a socially driven service of sharing, storing and searching manuals related to use of hardware and software : user guide, owner's manual, quick start guide, technical datasheets... DON'T FORGET : ALWAYS READ THE USER GUIDE BEFORE BUYING !!!
If this document matches the user guide, instructions manual or user manual, feature sets, schematics you are looking for, download it now. Lastmanuals provides you a fast and easy access to the user manual SONY SELP18110G. We hope that this SONY SELP18110G user guide will be useful to you.
Lastmanuals help download the user guide SONY SELP18110G.
Manual abstract: user guide SONY SELP18110G
Detailed instructions for use are in the User's Guide.
[. . . ] ˎˎ Be careful not to drop the lens when storing and carrying it. ˎˎ AF illuminator of the camera may be blocked by the lens. We recommend that you set the AF illuminator to OFF. ˎˎ When recording movies, zoom operation sound may be recorded depending on the camera or shooting conditions. [. . . ] 2 Move the POWER ZOOM lever to adjust
Move the POWER ZOOM lever toward T (Telephoto) to zoom in. move the POWER ZOOM lever toward W (Wide) to zoom out. Vignetting
ˎˎ When
三脚台座の取りはずしかた/取り付けかた
using the lens, the corners of the screen become darker than the center. To reduce these phenomena (called vignetting), close the aperture by 1 to 2 stops. *¹ This is the equivalent focal length in 35mm format when mounted on an Interchangeable Lens Digital Camera equipped with an APS-C sized image sensor. *² Angle of view is the value for Interchangeable Lens Digital Cameras equipped with an APS-C sized image sensor. *³ Minimum focus is the distance from the image sensor to the subject. ˎˎ Depending
Using the zoom ring
取りはずしかた (イラスト参照)
三脚をお使いにならない場合、 レンズから三脚台座を 取りはずすことができます。
マニュアルで光量調節する
1 レンズをカメラから取りはずす。
。
ˎˎ 詳しくは、レンズの取り付けかた/取りはずし 「 かた」 を参照してください。
カメラがMモードまたはAモードの状態で、 アイ リスリングを回して、 希望の絞り値 (F値) に合わ せる。
ご注意
動画撮影時にアイリスリングを操作するときは、 アイ リスリングクリック切り替えスイッチを 「OFF」 にして ください。イラスト-a) ( アイリスリングクリック切 り替えスイッチを 「ON」 にしたまま動画撮影中に絞り を変更すると、 操作音が記録されます。
Identifying the Parts
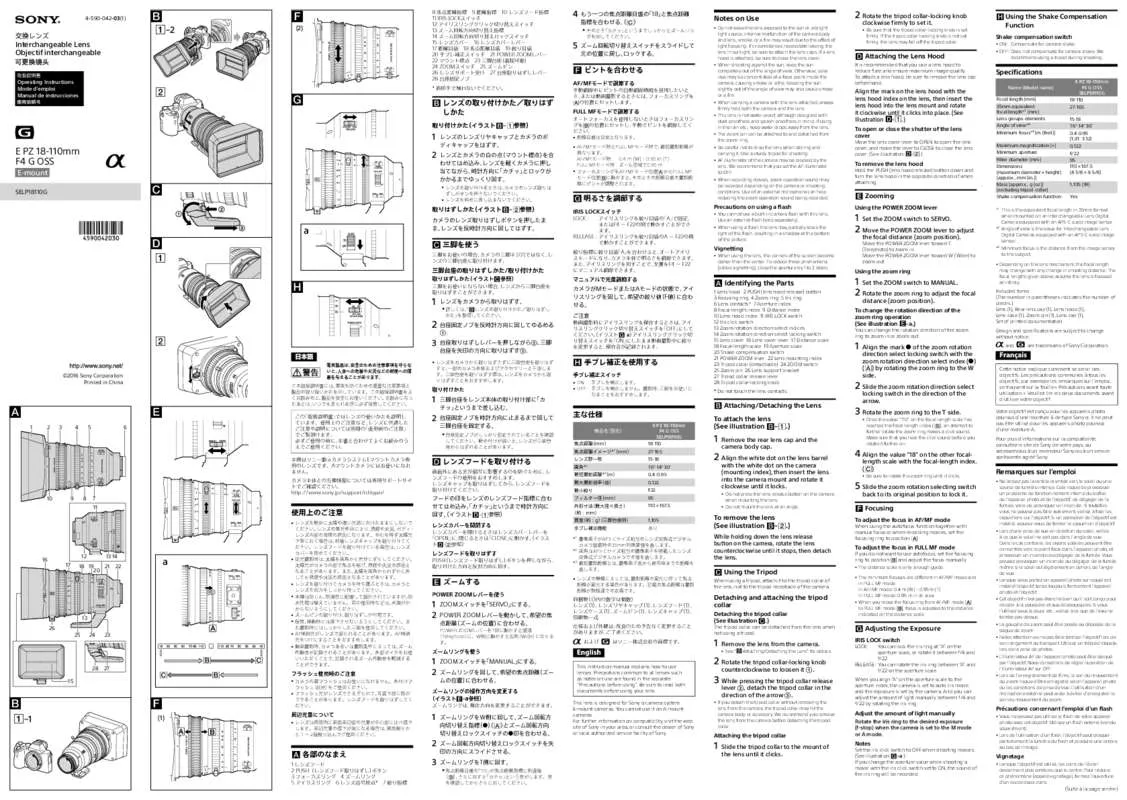
1 Lens hood 2 PUSH (lens hood release) button 3 Focusing ring 4 Zoom ring 5 Iris ring 6 Lens contacts* 7 Aperture index 8 Focal-length index 9 Distance index 10 Lens hood index 11 IRIS LOCK switch 12 Iris click switch 13 Zoom rotation direction select indices 14 Zoom rotation direction select locking switch 15 Lens cover 16 Lens cover lever 17 Distance scale 18 Focal-length scale 19 Aperture scale 20 Shake compensation switch 21 POWER ZOOM lever 22 Lens mounting index 23 Tripod collar (detachable) 24 ZOOM switch 25 Zoom pin 26 Lens support bracket 27 Tripod collar release lever 28 Tripod collar-locking knob * Do not touch the lens contacts. 2 Rotate the zoom ring to adjust the focal
distance (zoom position). To change the rotation direction of the zoom ring operation (See illustration -a. )
You can change the rotation direction of the zoom ring to zoom in or zoom out. On the lens mechanism, the focal length may change with any change in shooting distance. The focal lengths given above assume the lens is focused at infinity. 2 台座固定ノブを反時計方向に回してゆるめる
電気製品は、 安全のための注意事項を守らな いと、 人身への危害や火災などの財産への損 害を与えることがあります。
Included items (The number in parentheses indicates the number of pieces. ) Lens (1), Rear lens cap (1), Lens hood (1), Lens case (1), Zoom pin (1), Lens cap (1), Set of printed documentation Design and specifications are subject to change without notice. and are trademarks of Sony Corporation. ĸ脚 3 台座取りはずしレバーを押しながら、 台座を矢印の方向に取りはずす。
••レンズをカメラから取りはずさずに三脚台座を取りはず すと、 一部のカメラ本体およびアクセサリーと干渉しま す。三脚台座を取りはずす際は、 レンズをカメラから取 りはずすことをおすすめします。
1 Align the mark of the zoom rotation
手ブレ補正を使用する
•• ON: 手ブレを補正します。 •• OFF: 手ブレを補正しません。撮影時、 � 三脚をお使いに なることをおすすめします。
©2016 Sony Corporation Printed in China
手ブレ補正スイッチ
direction select locking switch with the zoom rotation direction select index () () by rotating the zoom ring to the W side. Locking switch in the direction of the arrow. Ό
1 2 3 4 5 6
この取扱説明書には、 事故を防ぐための重要な注意事項と 製品の取り扱いかたを示しています。この取扱説明書をよ くお読みの上、 製品を安全にお使いください。 お読みになっ たあとは、 いつでも見られる所に必ず保管してください。
取り付けかた
2 Slide the zoom rotation direction select 3 Rotate the zoom ring to the T side. 5 1, 105 あり
Attaching/Detaching the Lens To attach the lens (See illustration –. [. . . ] 離が無限遠での定義です。
To adjust the focus in FULL MF mode
If you do not want to use autofocus, set the focusing ring to position and adjust the focus manually. ˎˎ The ˎˎ The
Using the Tripod
When using a tripod, attach it to the tripod collar of the lens, not to the tripod receptacle of the camera. lj一式 仕様および外観は、 改良のため予告なく変更すること がありますが、 ご了承ください。 および はソニー株式会社の商標です。
Detaching and attaching the tripod collar
Detaching the tripod collar (See illustration . )
The tripod collar can be detached from the lens when not using a tripod. [. . . ]
DISCLAIMER TO DOWNLOAD THE USER GUIDE SONY SELP18110G Lastmanuals offers a socially driven service of sharing, storing and searching manuals related to use of hardware and software : user guide, owner's manual, quick start guide, technical datasheets...manual SONY SELP18110G


