User manual YAMAHA L-7
Lastmanuals offers a socially driven service of sharing, storing and searching manuals related to use of hardware and software : user guide, owner's manual, quick start guide, technical datasheets... DON'T FORGET : ALWAYS READ THE USER GUIDE BEFORE BUYING !!!
If this document matches the user guide, instructions manual or user manual, feature sets, schematics you are looking for, download it now. Lastmanuals provides you a fast and easy access to the user manual YAMAHA L-7. We hope that this YAMAHA L-7 user guide will be useful to you.
Lastmanuals help download the user guide YAMAHA L-7.
Manual abstract: user guide YAMAHA L-7
Detailed instructions for use are in the User's Guide.
[. . . ] Le recomendamos que monte el soporte en el orden indicado en estas instrucciones. Además, guarde estas instrucciones en un lugar seguro para poderlas consultar en el futuro.
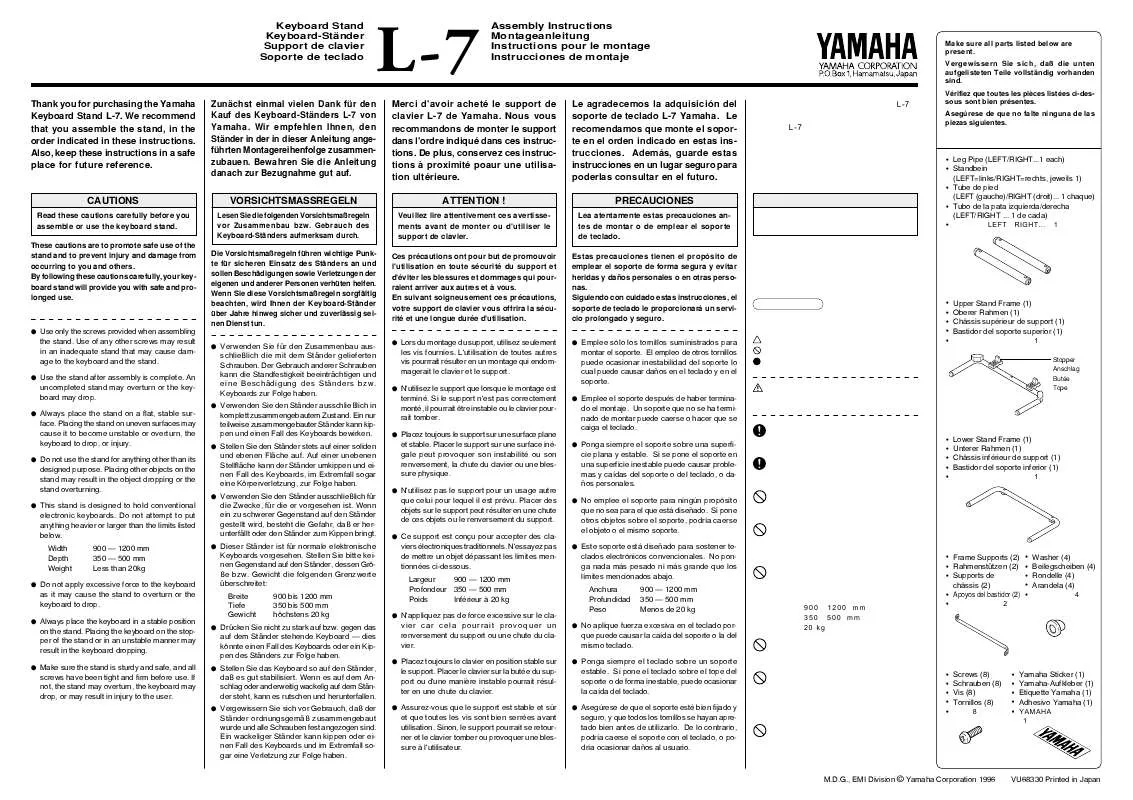
CAUTIONS
Read these cautions carefully before you assemble or use the keyboard stand. These cautions are to promote safe use of the stand and to prevent injury and damage from occurring to you and others. By following these cautions carefully, your keyboard stand will provide you with safe and prolonged use.
VORSICHTSMASSREGELN
Lesen Sie die folgenden Vorsichtsmaßregeln vor Zusammenbau bzw. [. . . ] gegen das
auf dem Ständer stehende Keyboard -- dies könnte einen Fall des Keyboards oder ein Kippen des Ständers zur Folge haben.
q Stellen Sie das Keyboard so auf den Ständer,
vier car cela pourrait provoquer un renversement du support ou une chute du clavier.
q Placez toujours le clavier en position stable sur
q No aplique fuerza excesiva en el teclado por-
que puede causar la caída del soporte o la del mismo teclado.
q Ponga siempre el teclado sobre un soporte
screws have been tight and firm before use. If not, the stand may overturn, the keyboard may drop, or may result in injury to the user.
daß es gut stabilisiert. Wenn es auf dem Anschlag oder anderweitig wackelig auf dem Ständer steht, kann es rutschen und herunterfallen.
q Vergewissern Sie sich vor Gebrauch, daß der
le support. Placer le clavier sur la butée du support ou d'une manière instable pourrait résulter en une chute du clavier.
q Assurez-vous que le support est stable et sûr
estable. Si pone el teclado sobre el tope del soporte o de forma inestable, puede ocasionar la caída del teclado.
q Asegúrese de que el soporte esté bien fijado y
Screws (8) Schrauben (8) Vis (8) Tornillos (8)
Yamaha Sticker (1) Yamaha-Aufkleber (1) Etiquette Yamaha (1) Adhesivo Yamaha (1)
Ständer ordnungsgemäß zusammengebaut wurde und alle Schrauben fest angezogen sind. Ein wackeliger Ständer kann kippen oder einen Fall des Keyboards und im Extremfall sogar eine Verletzung zur Folge haben.
et que toutes les vis sont bien serrées avant utilisation. Sinon, le support pourrait se retourner et le clavier tomber ou provoquer une blessure à l'utilisateur.
seguro, y que todos los tornillos se hayan apretado bien antes de utilizarlo. De lo contrario, podría caerse el soporte con el teclado, o podría ocasionar daños al usuario.
M. D. G. , EMI Division © Yamaha Corporation 1996
VU68330 Printed in Japan
First, lay the LEFT and RIGHT Leg Pipes as shown in the illustration. Firmly insert the Upper and Lower Stand Frame into the LEFT and RIGHT Leg Pipes. Make sure that LEFT/RIGHT Leg Pipes and Upper/Lower Stand Frames are in their relative positions. Using the 4 screws, loosely fix the Frame Supports to the Upper and Lower Stand Frames. After they have been loosely fixed, firmly tighten all 4 screws. Holding the LEFT and RIGHT Leg Pipes, place the stand in an upright position, insert the 4 washers into the holes on the Leg Pipe, and use 4 screws to fix the Upper and Lower Stand Frames to the LEFT/ RIGHT Pipe Legs. With the relative centers of the keyboard and the stand aligned, place the keyboard on the stand. Make sure good balance is obtained when the keyboard is placed on the stand. Depending upon the keyboard's size, legs, and jack placement, it may be necessary to change the position of the stoppers. If it is required, remove the screws and reposition. The stoppers may be placed in a forward or rear positions, as well as the left, center, or right sides of the Upper Stand Frame. Reposition the stoppers and firmly tighten the screws.
* Be aware Yamaha cannot be held responsible for damage to the keyboard if the keyboard accidentally drops from the stand or the stand overturns.
Legen Sie zunächst das linke (LEFT) und das rechte (RIGHT) Standbein zurecht, wie in der Abbildung gezeigt. Stecken Sie den oberen und den unteren Rahmen fest in die Bohrungen im linken (LEFT) und rechten (RIGHT) Standbein. Achten Sie dabei darauf, daß das linke/rechte Standbein sowie der obere/untere Rahmen an den richtigen Stellen montiert werden. Schrauben Sie die Rahmenstützen mit 4 Schrauben an den oberen und unteren Rahmen. [. . . ] Standbeine (LEFT = links, RIGHT = rechts) Das Ende mit dem Schwammdämpfer ist die Oberseite. Die Markierungen LEFT und RIGHT befinden sich am unteren Ende. Tube de pieds LEFT (gauche)/RIGHT (droit) L'extrémité spongieuse représente le haut du tube. Les repères LEFT (gauche) et RIGHT (droit) sont à l'extrémité inférieure du tube de pieds. [. . . ]
DISCLAIMER TO DOWNLOAD THE USER GUIDE YAMAHA L-7 Lastmanuals offers a socially driven service of sharing, storing and searching manuals related to use of hardware and software : user guide, owner's manual, quick start guide, technical datasheets...manual YAMAHA L-7


