Detailed instructions for use are in the User's Guide.
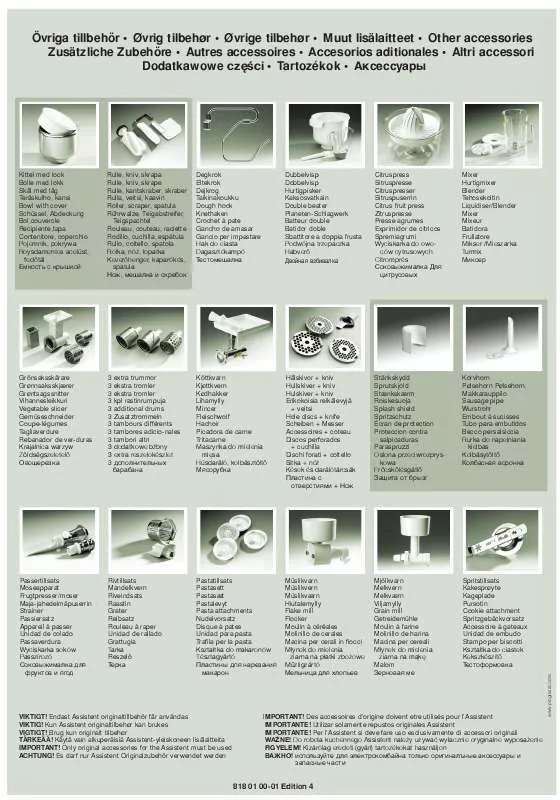
[. . . ] Övriga tillbehör · Øvrig tilbehør · Øvrige tilbehør · Muut lisälaitteet · Other accessories Zusätzliche Zubehöre · Autres accessoires · Accesorios aditionales · Altri accessori Dodatkawowe czci · Tartozékok ·
Kittel med lock Bolle med lokk Skål med låg Teräskulho, kansi Bowl with cover Schüssel, Abdeckung Bol, couvercle Recipiente, tapa Contenitore, coperchio Pojemnik, pokrywa Roysdamentes acelüst, fedtál
Rulle, kniv, skrapa Rulle, kniv, skrape Rulle, kantskraber, skraber Rulla, veitsi, kaavin Roller, scraper, spatula Rührwalze, Teigabstreifer, Teigspachtel Rouleau, couteau, raclette Rodillo, cuchilla, espátula Rullo, coltello, spatola Rolka, nó. lopatka Keverhenger, kaparókés, spatula ,
Degkrok Eltekrok Dejkrog Taikinakoukku Dough hook Knethaken Crochet à pate Gancho de amasar Gancio per impastare Hak do ciasta Dagasztókampó T
Dubbelvisp Dobbelvisp Hurtigpisker Kaksosvatkain Double beater Planeten-Schlagwerk Batteur double Batidor doble Sbattitore a doppia frusta Podwójna trzepaczka Habver
Citruspress Sitruspresse Citruspresser Sitruspuserrin Citrus fruit press Zitruspresse Presse agrumes Exprimidor de cítricos Spremiagrumi Wyciskarka do owoców cytrusowych Citromprés
Mixer Hurtigmixer Blender Tehosekoitin Liquidiser/Blender Mixer Mixeur Batidora Frullatore Mikser /Mieszarka Turmix
Grönsaksskärare Grønnsaksskjærer Grøntsagssnitter Vihannesleikkuri Vegetable slicer Gemüseschneider Coupe-légumes Tagliaverdure Rebanador de ver-duras Krajalnica warzyw Zöldsëgszeletel
3 3 3 3 3 3 3 3 3 3 3 3
extra trummor ekstra tromler ekstra tromler kpl rastinrumpuja additional drums Zusatztrommeln tambours différents tambores adicio-nales tambori altri dodatkowe bbny extra reszelokészlet
Köttkvarn Kjøttkvern Kødhakker Lihamylly Mincer Fleischwolf Hachoir Picadora de carne Tritacarne Maszynka do mielenia misa Húsdaráló, kolbásztölt
Hålskivor + kniv Hullskiver + kniv Hulskiver + kniv Erikokoisia reikälevyjä + veitsi Hole discs + knife Scheiben + Messer Accessoires + coteau Discos perforados + cuchilla Dischi forati + coltello Sitka + nó Kések és darálótárcsák +
Stänkskydd Sprutskjold Stænkskærm Roiskesuoja Splash shield Spritzschutz Écran de protection Proteccion contra salpicaduras Paraspruzzi Oslona przeciwrozpryskowa Frcsklésgátl
Korvhorn Pølsehorn Pølsehorn Makkarauppilo Sausage pipe Wurstrohr Embout à sucisses Tubo para embutidos Becco persalsiccia Rurka do napelniania kielbas Kolbásytlt
VIKTIGT!Endast Assistent originaltillbehör får användas VIKTIG!Kun Assistent originaltilbehør kan brukes VIGTIGT! [. . . ] Set the grinding level: Right for coarse and left for fine grinding. You can then adjust the grinding level and speed as required. Only use the mill to grind dry ingredients. such as wheat, rye, barley, buckwheat, millet, rice (coarse and fine), oats, flower seeds, spices, dried herbs, linseed, poppy seeds, dried mushrooms, sesame seeds, soybeans and coffee. not popcorn) may also be ground (for which we recommend two grinding stages, first coarse, then fine). Dismantling Unscrew the mill with the machine on its side, to avoid getting flour etc.
in the drive socket. First lift off the bowl and then unscrew the locking ring. Remove the various accessories and finally the mill housing. Cleaning Do not wash the adjustment mechanism. The mill ring and cone usually only need to be brushed clean. They can be hand washed and left to dry. All plastic accessories can be washed in a dishwasher. Place them in the upper dishwasher rack to prevent them from becoming deformed. Always clean the mill after grinding aromatic spices or coffee. Otherwise the taste from these will be passed on to the next food that is ground. The mill should also be cleaned after grinding seeds from oil plants. It is not necessary to clean it each time if you have only been grinding different types of flour. All accessories should be thoroughly dried before re-assembly. Re-assembling It is easiest to assemble the Assistent when it is upright. First attach the mill housing to the drive socket and then continue, as illustrated. When assembling the mill, ensure that: - There is no flour left in the square hole in the feeder screw. Otherwise you cannot make fine adjustments to the milling level. [. . . ] (Note: If you are using dark cookie sheets, preheat the oven to 325°F. ) On a lightly floured surface, roll out the dough to 1/4 -inch thickness, flouring as necessary. Using a 2-inch round cookie cutter, cut the dough into circles and transfer to nonstick cookie sheets, spacing the cookies 1 inch apart. Gather the scraps into a flat disk and refrigerate until firm. Bake the cookies until the edges are lightly golden, 8 to 10 minutes. [. . . ]


