User manual LINKSYS EFAH16
Lastmanuals offers a socially driven service of sharing, storing and searching manuals related to use of hardware and software : user guide, owner's manual, quick start guide, technical datasheets... DON'T FORGET : ALWAYS READ THE USER GUIDE BEFORE BUYING !!!
If this document matches the user guide, instructions manual or user manual, feature sets, schematics you are looking for, download it now. Lastmanuals provides you a fast and easy access to the user manual LINKSYS EFAH16. We hope that this LINKSYS EFAH16 user guide will be useful to you.
Lastmanuals help download the user guide LINKSYS EFAH16.
Manual abstract: user guide LINKSYS EFAH16
Detailed instructions for use are in the User's Guide.
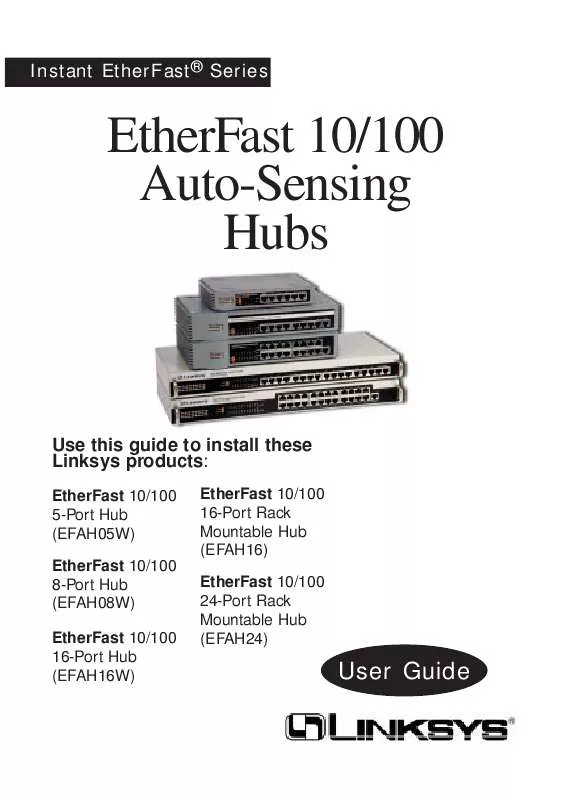
[. . . ] Instant EtherFast® Series
EtherFast 10/100 Auto-Sensing Hubs
Use this guide to install these Linksys products:
EtherFast 10/100 5-Port Hub (EFAH05W) EtherFast 10/100 8-Port Hub (EFAH08W) EtherFast 10/100 16-Port Hub (EFAH16W) EtherFast 10/100 16-Port Rack Mountable Hub (EFAH16) EtherFast 10/100 24-Port Rack Mountable Hub (EFAH24)
User Guide
COPYRIGHT & TRADEMARKS Copyright © 1998 Linksys, All Rights Reserved. Instant EtherFast is a registered trademark of Linksys. Microsoft, Windows, and the Windows logo are registered trademarks of Microsoft Corporation. All other trademarks and brand names are the property of their respective proprietors. [. . . ] Plug the power adapter's plug into the hub's power jack. Plug the provided AC electrical cord into the power adapter. Finally, plug the other end of the electrical cord into a standard AC electrical outlet. The hub will put itself through a series of diagnostic tests -- which shouldn't take more than just a few seconds -- then begin scanning the ports for live nodes. Rack Mountable Model To power on the hub, plug the supplied AC electrical power cord into the back of the hub. The hub will put itself through a series of diagnostic tests -- which shouldn't take more than just a few seconds -then begin scanning the ports for live nodes. The installation is complete.
Resetting the Hub
To reset the hub, turn the unit off for at least three seconds and then turn it back on. If you have a rack mountable model, you can use the reset button in the back of the hub to run the reset power cycle. Use a small screwdriver or other pointy object that can fit through the hole on the back of the unit and reach the button. Hold the button for 2 or 3 seconds, then let go. Note: If you power cycle the hub or hold down the reset button for too long, you may lose some connections.
10
Appendix
Twisted Pair Cabling
There are different grades, or categories, of twisted-pair cabling. Category 5 is the most reliable and widely compatible, and is required for Fast Ethernet. You can buy Category 5 cabling that is pre-made, or you can cut and crimp your own. Category 5 cables can be purchased or crimped as either straight-through or crossed. A Category 5 cable has 8 thin, color-coded wires inside that run from one end of the cable to the other. Only wires 1, 2, 3, and 6 are used by Ethernet networks. In a straight-through cable, wires 1, 2, 3, and 6 at one end of the cable are also wires 1, 2, 3, and 6 at the other end. In a crossed cable, the order of the wires change from one end to the other: wire 1 becomes 3, and 2 becomes 6 and vice versa. The color code for the 4 wires should be as follows: Wire 1, white with an orange stripe; Wire 2, orange; Wire 3, white with a green stripe; Wire 6, green. The other four wires have to be connected as follows: Wire 4, blue; Wire 5, white with a blue stripe; Wire7, white with a brown stripe, Wire 8, brown. To figure out which wire is wire number 1, hold the cable so that the end of the plastic RJ-45 tip (the part that goes into a wall jack first) is facing away from you. Flip the clip so that the copper side faces up (the springy clip will now be parallel to the floor). [. . . ] The distance between the two hubs with tranceiver modules is limited to a maximum of 16 meters (50 feet). For a full explanation of fiber optic cabling distance rules, see the chart on page 15. Note: In the illustration, no other 100Mbps hubs can be cascaded to hubs B and C with RJ-45 cabling. Another 100Mbps hub can be connected to either hub A or hub D with RJ-45 cabling with no problems.
A
Maximum distance of 208 meters
B
Maximum distance of 16 meters
C
D
Maximum distance of 208 meters
15
100BaseTX Distance Extender Module
This module has a special distance extending port that sends data at 100Mbps over regular 100BaseTX Category 5 cabling. [. . . ]
DISCLAIMER TO DOWNLOAD THE USER GUIDE LINKSYS EFAH16 Lastmanuals offers a socially driven service of sharing, storing and searching manuals related to use of hardware and software : user guide, owner's manual, quick start guide, technical datasheets...manual LINKSYS EFAH16


