Detailed instructions for use are in the User's Guide.
[. . . ] In the case of the symbol at left, it is used for general cautions, warnings, or alerts to danger. The symbol alerts the user to items that must never be carried out (are forbidden). The specific thing that must not be done is indicated by the design contained within the circle. In the case of the symbol at left, it means that the unit must never be disassembled. [. . . ] Use a commercially available tuning key to tighten the stopper bolt.
The stopper keeps the cymbal pad from turning, and prevents the cables from catching or getting tangled on the stand.
2. Make the trigger settings for the percussion sound module. 7.
Tighten the bolt with the included tuning key.
Stopper (Be sure to orient it correctly)
Should you neglect to make the appropriate settings for the percussion sound module, you could likely experience the following problems: · Sometimes it does not sound (uneven volume) · The volume is too low (reduced sensitivity)
For information on how to change the parameters for a percussion sound module, refer to the documentation for the percussion sound module you're using.
2. Attach the CY-6 so the unit is oriented as shown in the diagram. Tighten the wing nut to obtain the desired movement.
Use the included felt washer and the wing nut.
Wing Nut Felt Washer
4
CY-6
Playing the CY-6
Bow Shot
This is the most common playing method, playing the pad face of the cymbal. It corresponds to the sound of the "head-side" of the connected trigger input.
Bow
Choking
Choking (pinching) the cymbal's edge with the hand immediately after hitting the cymbal makes the sound stop.
To make use of choking play techniques, you'll need to connect to a trigger input jack on the percussion sound module that accommodates rim shots.
Specifications
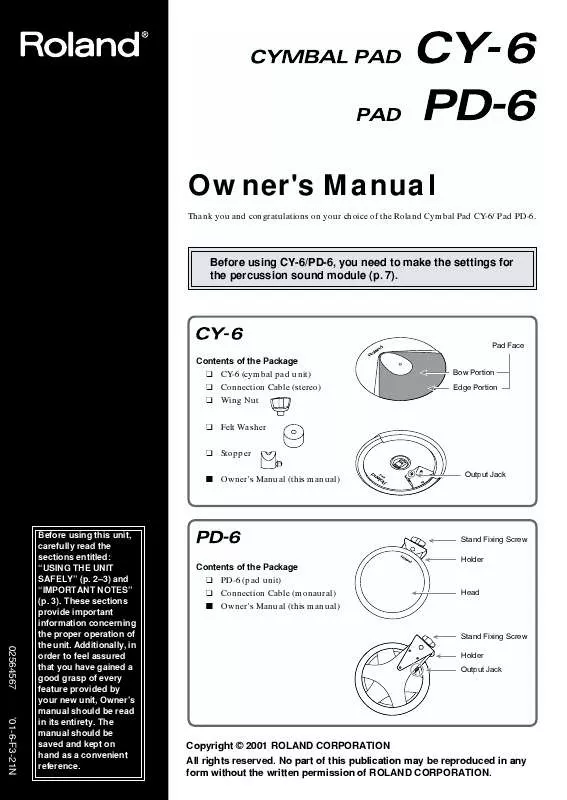
CY-6: Cymbal Pad
Edge Shot
This playing method involves striking the edge with the shoulder of the stick. It corresponds to the sound of the "rimside" of the connected trigger input.
To make use of edge shot, you'll need to connect to a trigger input jack on the percussion sound module that accommodates rim shots.
Pad Size: 12 inches Triggers: 2 (Bow, Edge) Dimensions: 290 (W) x 295 (D) x 45 (H) mm 11-7/16 (W) x 11-5/8 (D) x 1-13/16 (H) inches Weight: 0. 6 kg / 1 lb 6 oz Accessories: Owner's Manual, Connection Cable, Wing Nut, Felt Washer, Stopper Options: Cymbal Mounts (MDY-10U) Drum Stands (MDS-6, MDS-7U, MDS-8, MDS-10)
Edge
In the interest of product improvement, the specifications and/or appearance of this unit are subject to change without prior notice.
5
PD-6
Features
· Velocity sensitive pad provides rich expression. · Compact, 8. 5-inch pad allows for greater versatility when setting up. · Compatible with all Roland percussion sound modules (p. · When used with a percussion sound module capable of positional sensing, you can obtain tonal changes by varying the location at which the pad is struck.
Connecting to a Percussion Sound Module (TD-6, TD-8, TD-10, etc. )
To prevent malfunction and/or damage to speakers or other devices, always turn down the volume, and turn off the power on all devices before making any connections.
1. Use the included connection cable and connect the output jack of the PD-6 to the trigger input jack of the percussion sound module.
Connect the L-shaped plug of the included cable to the PD-6. This will prevent strain from being applied to the PD-6.
For details on positional sensing, refer to the documentation for the percussion sound module you're using.
Making the Settings
Attaching the Cymbal Pad to a Stand
Attach the PD-6 to a separately sold drum stand (MDS-6, MDS7U, MDS-8, or MDS-10).
2. Make the trigger settings for the percussion sound module. 7.
When attaching the PD-6 to the pad mount, be sure to tighten the stand fixing screw securely. *2: Each trigger parameter can be set independently for the "head-side" and "rim-side. " Set to the same value for the head and rim. Trigger parameters can be set individually for each patch. *3: The HPD-15 supports the use of edge shots with the CY-6, but it does not support choking techniques.
7
When you need repair service, call your nearest Roland Service Center or authorized Roland distributor in your country as shown below.
Information
AFRICA
EGYPT
Al Fanny Trading Office
P. O. Box 2904, El Horrieh Heliopolos, Cairo, EGYPT TEL: (02) 4185531
SINGAPORE
Swee Lee Company
150 Sims Drive, SINGAPORE 387381 TEL: 846-3676
PANAMA
SUPRO MUNDIAL, S. A.
Boulevard Andrews, Albrook, Panama City, REP. DE PANAMA TEL: (507) 315-0101
ITALY
Roland Italy S. A.
Viale delle Industrie 8, 20020 Arese, Milano, ITALY TEL: (02) 937-78300
ISRAEL
Halilit P. Greenspoon & Sons Ltd.
8 Retzif Ha'aliya Hashnya St. Tel-Aviv-Yafo ISRAEL TEL: (03) 6823666
CRISTOFORI MUSIC PTE LTD
Blk 3014, Bedok Industrial Park E, #02-2148, SINGAPORE 489980 TEL: 243 9555
PARAGUAY
Distribuidora De Instrumentos Musicales
J. E. [. . . ] Music Sound Light
155, New National Road 26422 Patras, GREECE TEL: 061-435400
MALAYSIA
BENTLEY MUSIC SDN BHD
140 & 142, Jalan Bukit Bintang 55100 Kuala Lumpur, MALAYSIA TEL: (03) 2144-3333
U. Eastern Avenue Los Angeles, CA 90040-2938, U. TEL: (323) 890 3700
EL SALVADOR
OMNI MUSIC
75 Avenida Notre YY Alameda, Juan Pablo 2, No. 4010 San Salvador, EL SALVADOR TEL: (503) 262-0788
CYPRUS
Radex Sound Equipment Ltd.
17 Diagorou St. , P. O. [. . . ]


