User manual VIEWCAST NIAGARA 2120 QUICK GUIDE
Lastmanuals offers a socially driven service of sharing, storing and searching manuals related to use of hardware and software : user guide, owner's manual, quick start guide, technical datasheets... DON'T FORGET : ALWAYS READ THE USER GUIDE BEFORE BUYING !!!
If this document matches the user guide, instructions manual or user manual, feature sets, schematics you are looking for, download it now. Lastmanuals provides you a fast and easy access to the user manual VIEWCAST NIAGARA 2120. We hope that this VIEWCAST NIAGARA 2120 user guide will be useful to you.
Lastmanuals help download the user guide VIEWCAST NIAGARA 2120.
You may also download the following manuals related to this product:
Manual abstract: user guide VIEWCAST NIAGARA 2120QUICK GUIDE
Detailed instructions for use are in the User's Guide.
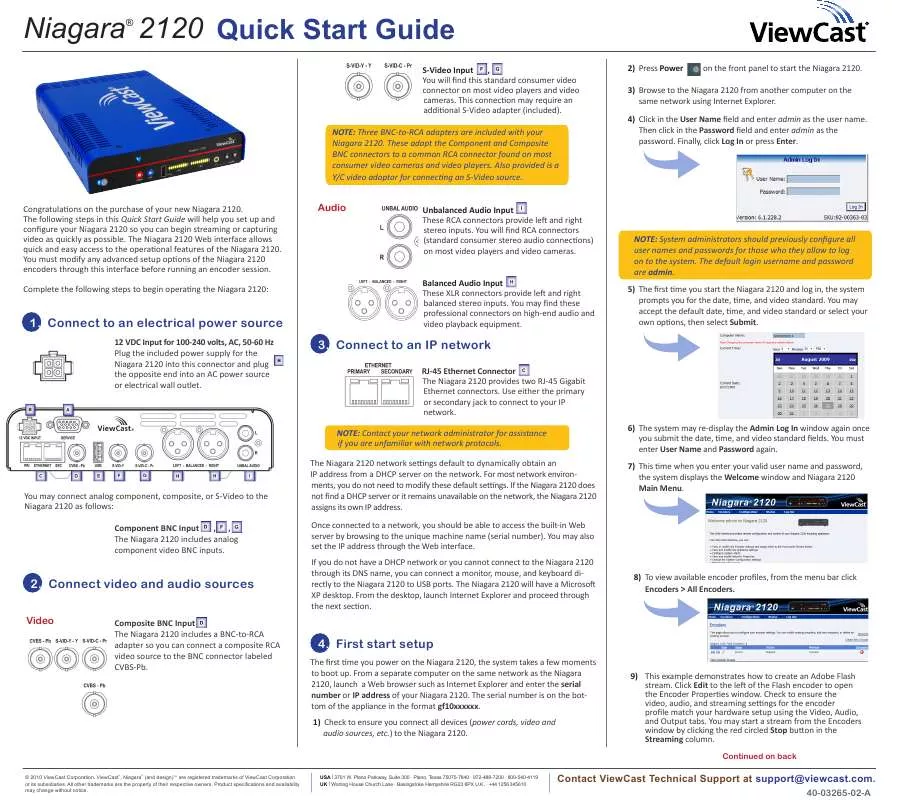
[. . . ] 3) Browse to the Niagara 2120 from another computer on the same network using Internet Explorer. 4) Click in the User Name field and enter admin as the user name. Then click in the Password field and enter admin as the password. Finally, click Log In or press Enter.
Audio
Unbalanced Audio Input These RCA connectors provide left and right stereo inputs. [. . . ] If you do not have a DHCP network or you cannot connect to the Niagara 2120 through its DNS name, you can connect a monitor, mouse, and keyboard directly to the Niagara 2120 to USB ports. The Niagara 2120 will have a Microsoft XP desktop. From the desktop, launch Internet Explorer and proceed through the next section. 8) To view available encoder profiles, from the menu bar click Encoders > All Encoders. 6) The system may re-display the Admin Log In window again once you submit the date, time, and video standard fields. You must enter User Name and Password again. 7) This time when you enter your valid user name and password, the system displays the Welcome window and Niagara 2120 Main Menu.
You may connect analog component, composite, or S-Video to the Niagara 2120 as follows: Component BNC Input , , The Niagara 2120 includes analog component video BNC inputs.
2. Connect video and audio sources
Video
Composite BNC Input The Niagara 2120 includes a BNC-to-RCA adapter so you can connect a composite RCA video source to the BNC connector labeled CVBS-Pb.
4. First start setup
The first time you power on the Niagara 2120, the system takes a few moments to boot up. From a separate computer on the same network as the Niagara 2120, launch a Web browser such as Internet Explorer and enter the serial number or IP address of your Niagara 2120. The serial number is on the bottom of the appliance in the format gf10xxxxxx. 1) Check to ensure you connect all devices (power cords, video and audio sources, etc. ) to the Niagara 2120. 9) This example demonstrates how to create an Adobe Flash stream. Click Edit to the left of the Flash encoder to open the Encoder Properties window. Check to ensure the video, audio, and streaming settings for the encoder profile match your hardware setup using the Video, Audio, and Output tabs. You may start a stream from the Encoders window by clicking the red circled Stop button in the Streaming column.
Continued on back
© 2010 ViewCast Corporation. ViewCast®, Niagara® (and design)TM are registered trademarks of ViewCast Corporation or its subsidiaries. All other trademarks are the property of their respective owners. Product specifications and availability may change without notice.
USA | 3701 W. Plano Parkway, Suite 300 Plano, Texas 75075-7840 972-488-7200 800-540-4119 UK | Worting House Church Lane Basingstoke Hampshire RG23 8PX U. K. +44 1256 345610
l l l l l
Contact ViewCast Technical Support at support@viewcast. com.
40-03265-02-A
Niagara® 2120 Quick Start Guide
4. First start setup continued
10) On the Video tab, set video Input to Composite.
The Niagara 2120 Front Panel
J: Remote Control I: Alarm/Status Indicator
11) Click the Audio tab and set audio Input to Unbalanced.
K: Video Confidence Indicator
Figure 1. [. . . ] · This button has three different options: 1. Press and release after the first set of 10 LEDs start to light (approximately 1 to 3 seconds) to reboot the Niagara 2120.
NOTE: The lights on the volume indicator will illuminate in one-second intervals.
· Audio feedback meters. · Shows incoming left and right audio channel input.
Headphone Jack
· Allows for connection of headphones to the Niagara 2120 for audio
monitoring. · This control changes the volume on the headset output only.
Alarm/Status Indicator Remote Control Volume Button (Up/Down)
2. Press and release after the second set of 10 LEDs start to light (approximately 4 to 6 seconds) to keep all set profiles and restore the Niagara 2120 operating system.
NOTE:The lights on the volume indicator will illuminate in one-second intervals, but do NOT progress all the way to the far right.
· This indicator illuminates when a system alert occurs. · Displays to indicate a remote user.
· Video encoding status (active).
Video Confidence Indicator
· A remote user is accessing the Niagara 2120 across the network.
3. Press and hold for approximately 10 seconds until all 20 LEDs remain lit to restore the Niagara 2120 to complete factory defaults.
Warning!Option 3 deletes all previously set profiles.
© 2010 ViewCast Corporation. [. . . ]
DISCLAIMER TO DOWNLOAD THE USER GUIDE VIEWCAST NIAGARA 2120 Lastmanuals offers a socially driven service of sharing, storing and searching manuals related to use of hardware and software : user guide, owner's manual, quick start guide, technical datasheets...manual VIEWCAST NIAGARA 2120


 VIEWCAST NIAGARA 2120 V1.0 (2671 ko)
 VIEWCAST NIAGARA 2120 2-2010 (2132 ko)
 VIEWCAST NIAGARA 2120 QUICK START GUIDE (1295 ko)
